 Save to Pinterest
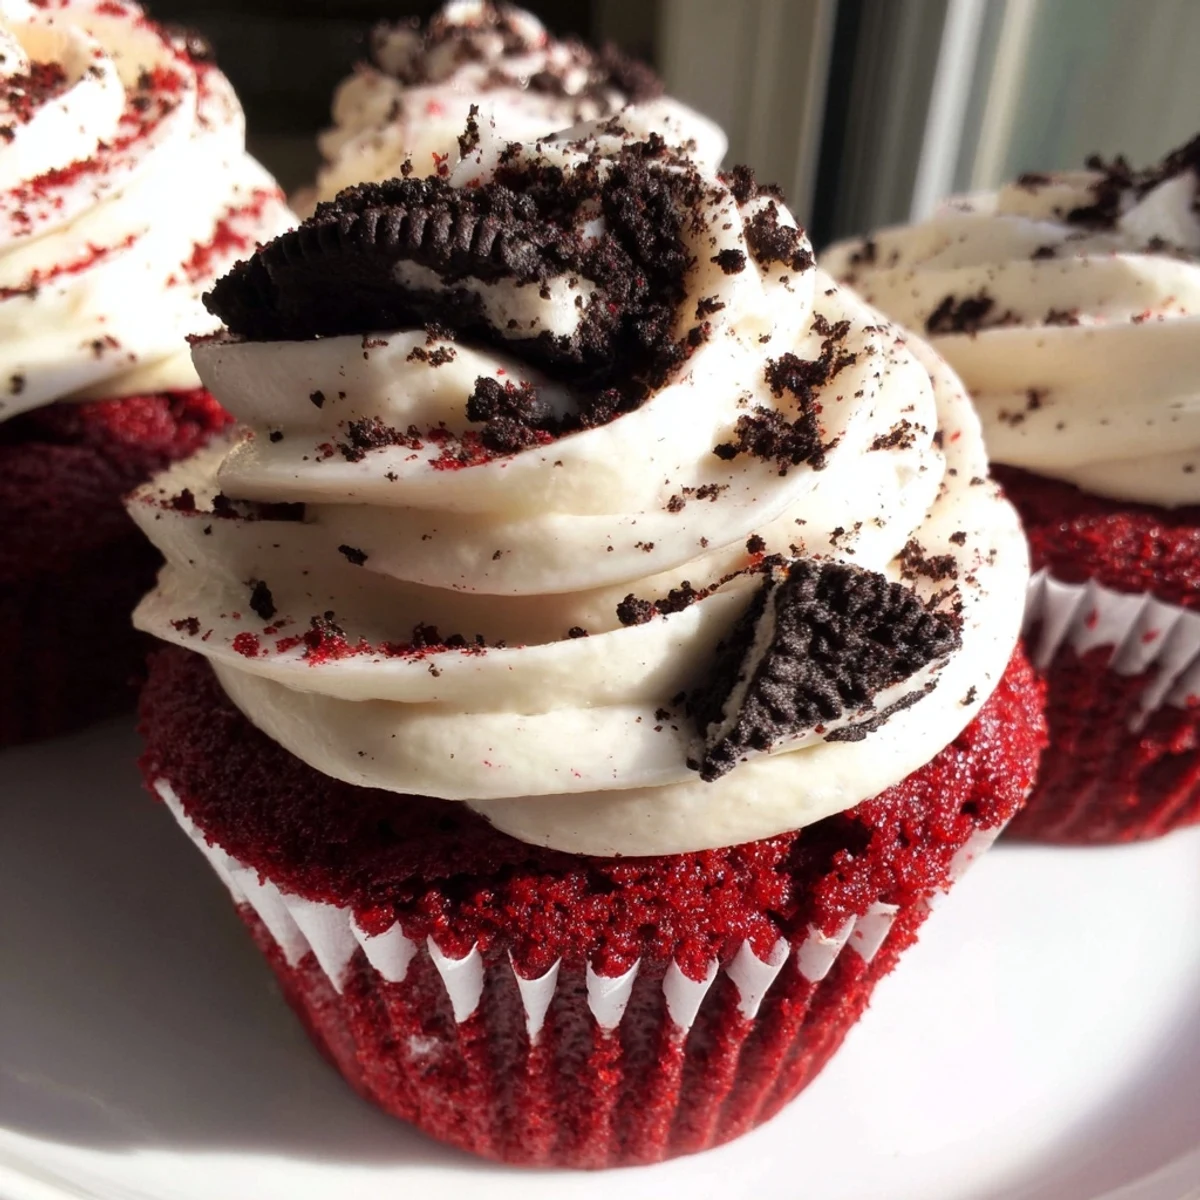
 These red velvet Oreo cupcakes combine a tender, cocoa-kissed red velvet base with generous chunks of chopped Oreo cookies folded right into the batter.
Each cupcake is crowned with a luscious cream cheese frosting infused with finely crushed Oreos, delivering a delightful cookies-and-cream twist on a beloved classic.
Ready in just 40 minutes, they yield 12 beautifully decorated cupcakes ideal for birthdays, potlucks, or whenever you want to impress with minimal fuss.
The oven hummed at 350 degrees and my kitchen already smelled like cocoa and something vaguely chemical from the red food coloring gel I had just squirted onto my fingers by accident. My niece was sitting on the counter, swinging her legs and demanding to know why the batter looked like something from a horror movie. I told her it was vampire cake and she believed me for an embarrassing three years. These red velvet Oreo cupcakes were born that afternoon out of boredom and a half eaten sleeve of cookies, and they have been my most requested party contribution ever since.
I brought a tray of these to a friends potluck last summer and watched a grown man eat four of them while pretending to help with dishes. He held one behind his back while rinsing a plate. I pretended not to notice.
Ingredients
- All purpose flour (1 1/4 cups): The backbone of the crumb, and you want it measured by spooning into the cup rather than scooping or you will end up with dense little hockey pucks.
- Unsweetened cocoa powder (3 tbsp): Just enough to give red velvet its signature subtle chocolate flavor without turning it into a full chocolate cupcake.
- Baking soda (1/2 tsp): This reacts with the vinegar and buttermilk to give you lift, so do not skip either one.
- Salt (1/4 tsp): A small amount that wakes up every other flavor in the bowl.
- Vegetable oil (1/2 cup): Oil keeps these moister than butter would, and moisture is the whole game with cupcakes.
- Granulated sugar (3/4 cup): Sweetness balanced by the tang of buttermilk and vinegar so nothing tastes one note.
- Large egg (1, room temperature): Room temp matters here because cold egg into room temp buttermilk causes clumping you do not want to deal with.
- Buttermilk (1/2 cup, room temperature): The tang is essential to real red velvet flavor, and no, regular milk with a squeeze of lemon is not quite the same though it will do in a pinch.
- Red food coloring gel (1 tbsp): Gel is stronger and less watery than liquid, which means better color without throwing off the batter consistency.
- Pure vanilla extract (1 tsp): Rounds out the flavor and ties the chocolate and tang together quietly.
- Distilled white vinegar (1/2 tsp): Works with baking soda for rise and adds to the classic tang.
- Oreo cookies (10, roughly chopped for batter): Rough chop means some chunks and some crumbs, which gives you texture variety in every bite.
- Unsalted butter (1/2 cup, softened for frosting): Must be truly soft or your frosting will have lumps that no amount of beating can fix.
- Cream cheese (8 oz, softened for frosting): Full fat brick style, not the spreadable kind in a tub, or your frosting will never set properly.
- Powdered sugar (2 cups, sifted for frosting): Sifting feels fussy but prevents those awful sugar clumps that ruin a smooth pipe.
- Pure vanilla extract (1 tsp for frosting): A second teaspoon in the frosting because cream cheese needs the help.
- Oreo cookies (6, finely crushed for frosting): Finely crushed so the frosting stays pipeable with visible flecks rather than chunky and difficult to work with.
Instructions
- Preheat and prep:
- Set your oven to 350 degrees F and line a standard 12 cup muffin tin with paper liners. This is the part where you remind yourself that cupcake liners exist to save you from scrubbing a tin later.
- Whisk the dry team:
- In a medium bowl, whisk together the flour, cocoa powder, baking soda, and salt until evenly blended. Set it aside and admire how dark and dusty it looks like a tiny cocoa beach.
- Build the wet mixture:
- In a large bowl, beat the oil and sugar together until they look like wet sand, then add the egg, buttermilk, red food coloring, vanilla, and vinegar. Mix until everything is smooth and impossibly red and you briefly wonder if it will stain your countertop forever.
- Bring it all together:
- Gradually add the dry ingredients to the wet and mix just until combined. The moment you stop seeing dry flour is the moment you stop mixing because overmixing is the enemy of tender cupcakes.
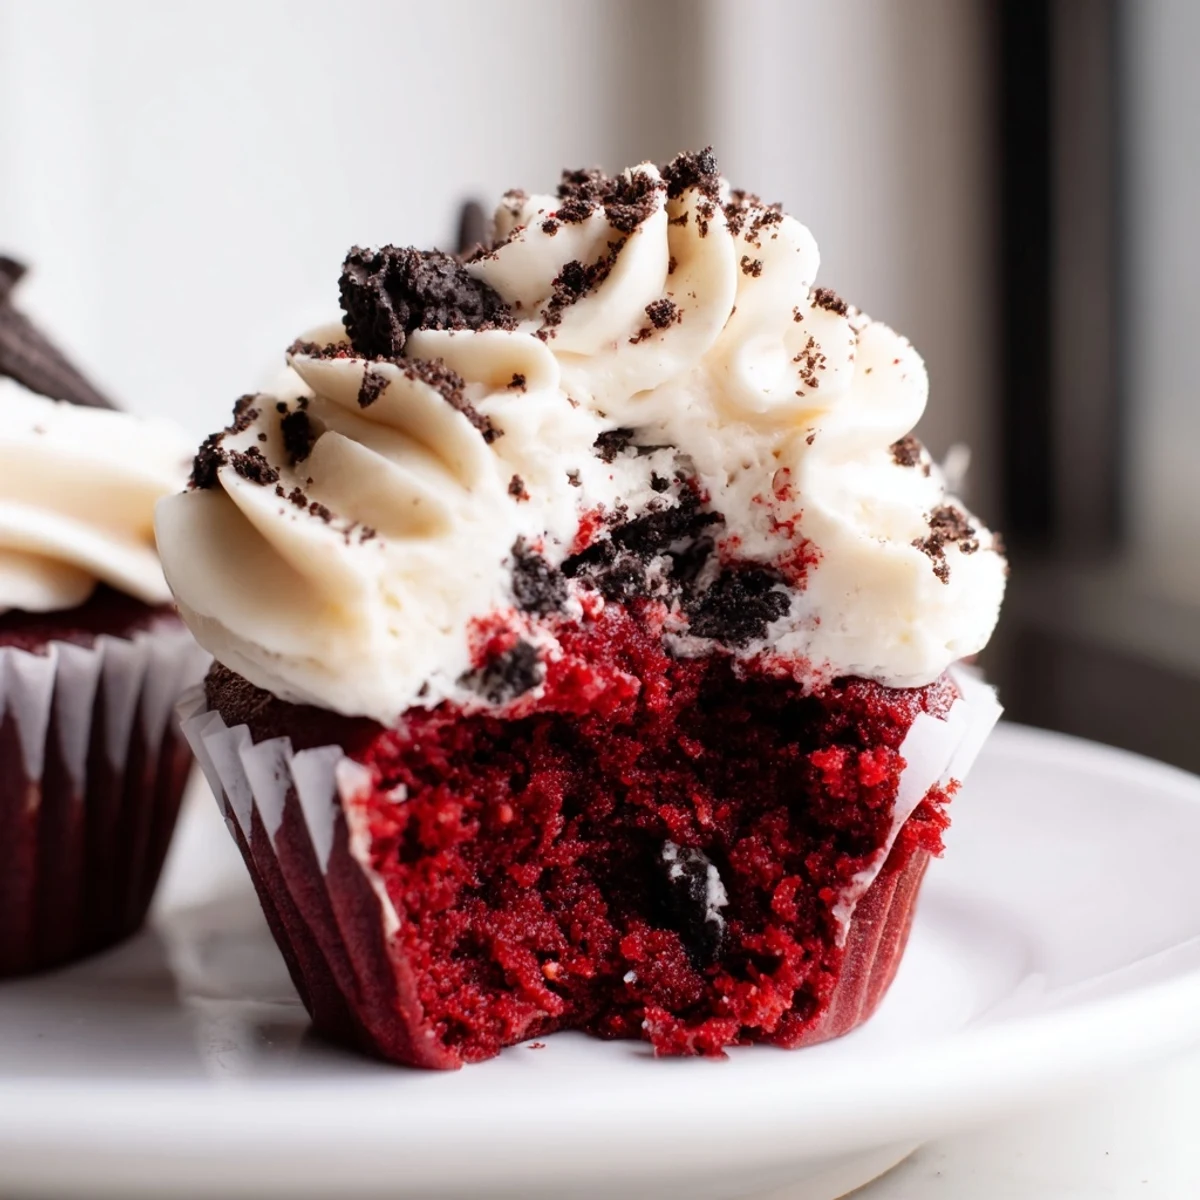
- Fold in the Oreos:
- Gently fold in the roughly chopped cookies with a spatula, trying not to crush them into dust. You want visible white cream filling bits peeking through that red batter.
- Fill and bake:
- Divide the batter evenly among the liners, filling each about two thirds full. Bake for 18 to 20 minutes until a toothpick comes out clean, then let them sit in the pan for 5 minutes before moving to a wire rack.
- Make the frosting:
- Beat the softened butter and cream cheese together until creamy and no lumps remain. Add the sifted powdered sugar and vanilla and beat until fluffy, then gently fold in the finely crushed Oreos by hand so the frosting stays light.
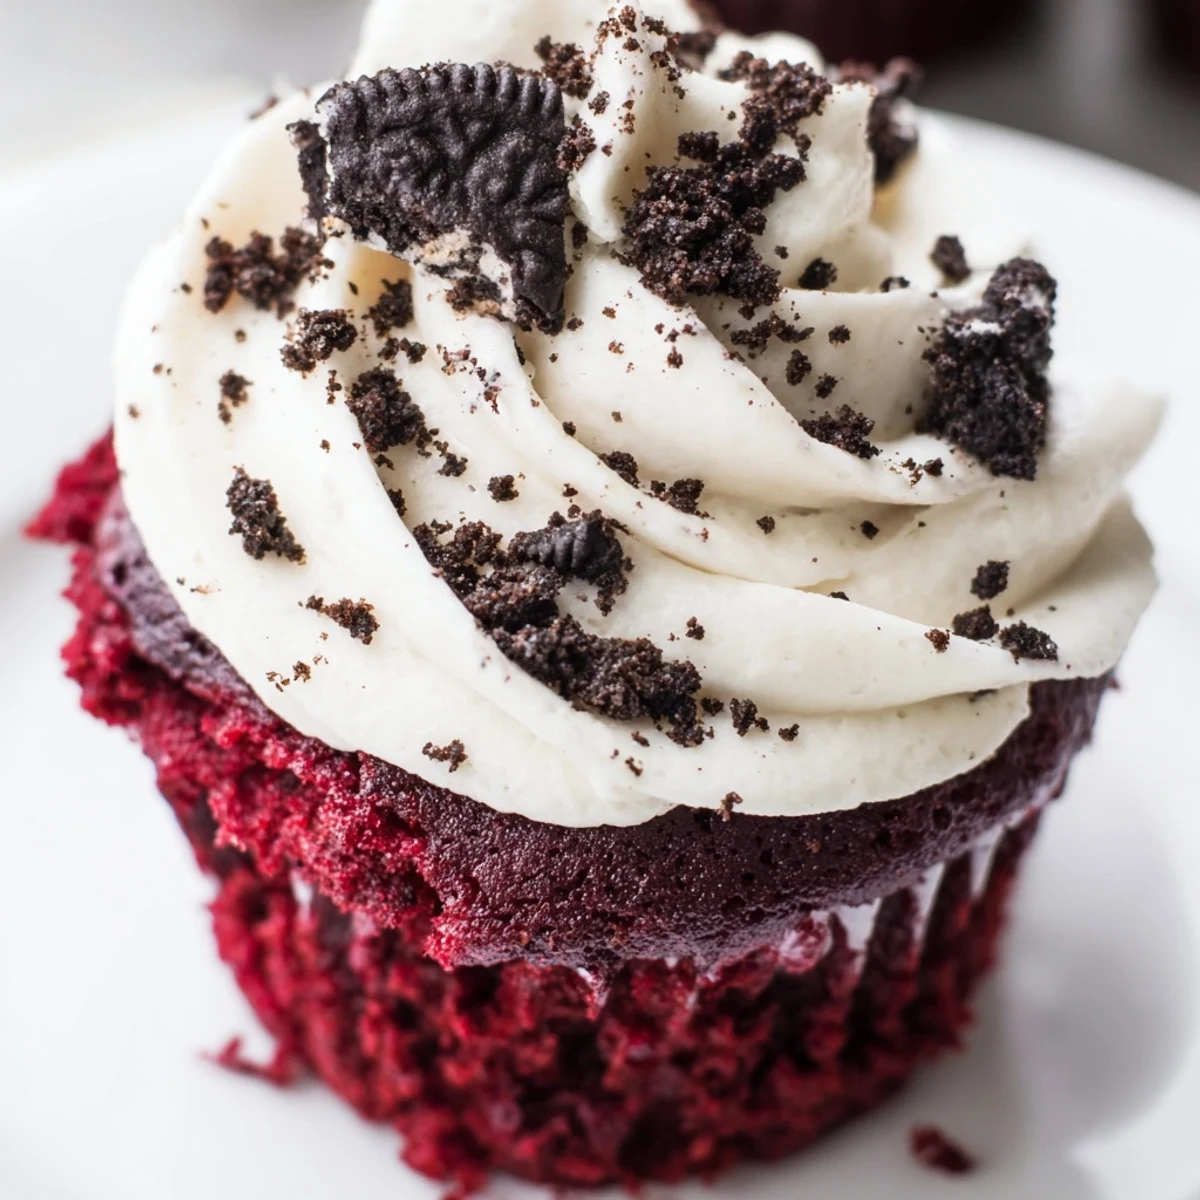
- Frost and finish:
- Pipe or spread the frosting onto fully cooled cupcakes and sprinkle with extra Oreo crumbs if you want to look like you tried harder than you actually did. They are ready immediately but even better after an hour in the fridge.
 Save to Pinterest
 The year my sister got married I made 72 of these cupcakes the night before the rehearsal dinner and my arms were so sore from piping I could barely lift my champagne glass. Nobody complained and there were exactly zero left by midnight.
Getting the Red Velvet Color Right
I used to use liquid food coloring from the grocery store and ended up adding so much that the batter turned runny and the cupcakes tasted vaguely metallic. Switching to gel was a revelation because one tablespoon gives you that deep dramatic red without altering the texture at all.
Making These Gluten Free
A friend with celiac disease asked me to adapt these and I was skeptical, but a good one to one gluten free flour blend works surprisingly well here. You will also need to track down gluten free chocolate sandwich cookies, which exist now and are shockingly close to the real thing.
Storing and Serving Leftovers
These cupcakes are actually better on day two because the crumb settles and the Oreo pieces soften into the cake in the most satisfying way. Keep them in an airtight container in the fridge and let them sit at room temperature for about 20 minutes before serving so the frosting softens back up.
- A chilled cupcake with cold firm frosting is still delicious but not nearly as good as one that has had time to relax.
- If you are transporting them keep them cold in the container and frost at your destination if possible.
- They last up to four days refrigerated but honestly they will not last that long.
 Save to Pinterest
 Every time I make these I think about that afternoon with my niece and the vampire cake lie I still have not fully corrected. Some recipes become part of your story in ways the ingredients never suggest they could.
Recipe Questions & Answers
- → Can I make these cupcakes ahead of time?
-
Yes, you can bake the cupcakes a day in advance and store them in an airtight container at room temperature. Frost them on the day of serving for the freshest presentation and texture.
- → Why is buttermilk used in the batter?
-
Buttermilk adds tanginess and reactes with the baking soda to create a lighter, more tender crumb. If you don't have buttermilk on hand, substitute with regular milk mixed with a splash of lemon juice or white vinegar.
- → How should I store leftover cupcakes?
-
Store frosted cupcakes in the refrigerator in an airtight container for up to three days. Let them sit at room temperature for about 15 minutes before serving so the frosting softens and the cake becomes more tender.
- → Can I use natural food coloring instead of gel?
-
Gel food coloring provides a more vibrant red hue without adding extra liquid to the batter. Liquid coloring works but may require more to achieve the same depth of color, which can slightly alter the texture.
- → How do I get a neater frosting presentation?
-
Use a piping bag fitted with a large star or round tip for a polished swirl. Chill the frosting for 10 to 15 minutes before piping if it feels too soft, and always make sure the cupcakes are completely cool before frosting.
- → Can I make these gluten-free?
-
Absolutely. Swap the all-purpose flour for a one-to-one gluten-free baking blend and use certified gluten-free chocolate sandwich cookies. The texture may be slightly denser but still delicious.
