 Save to Pinterest
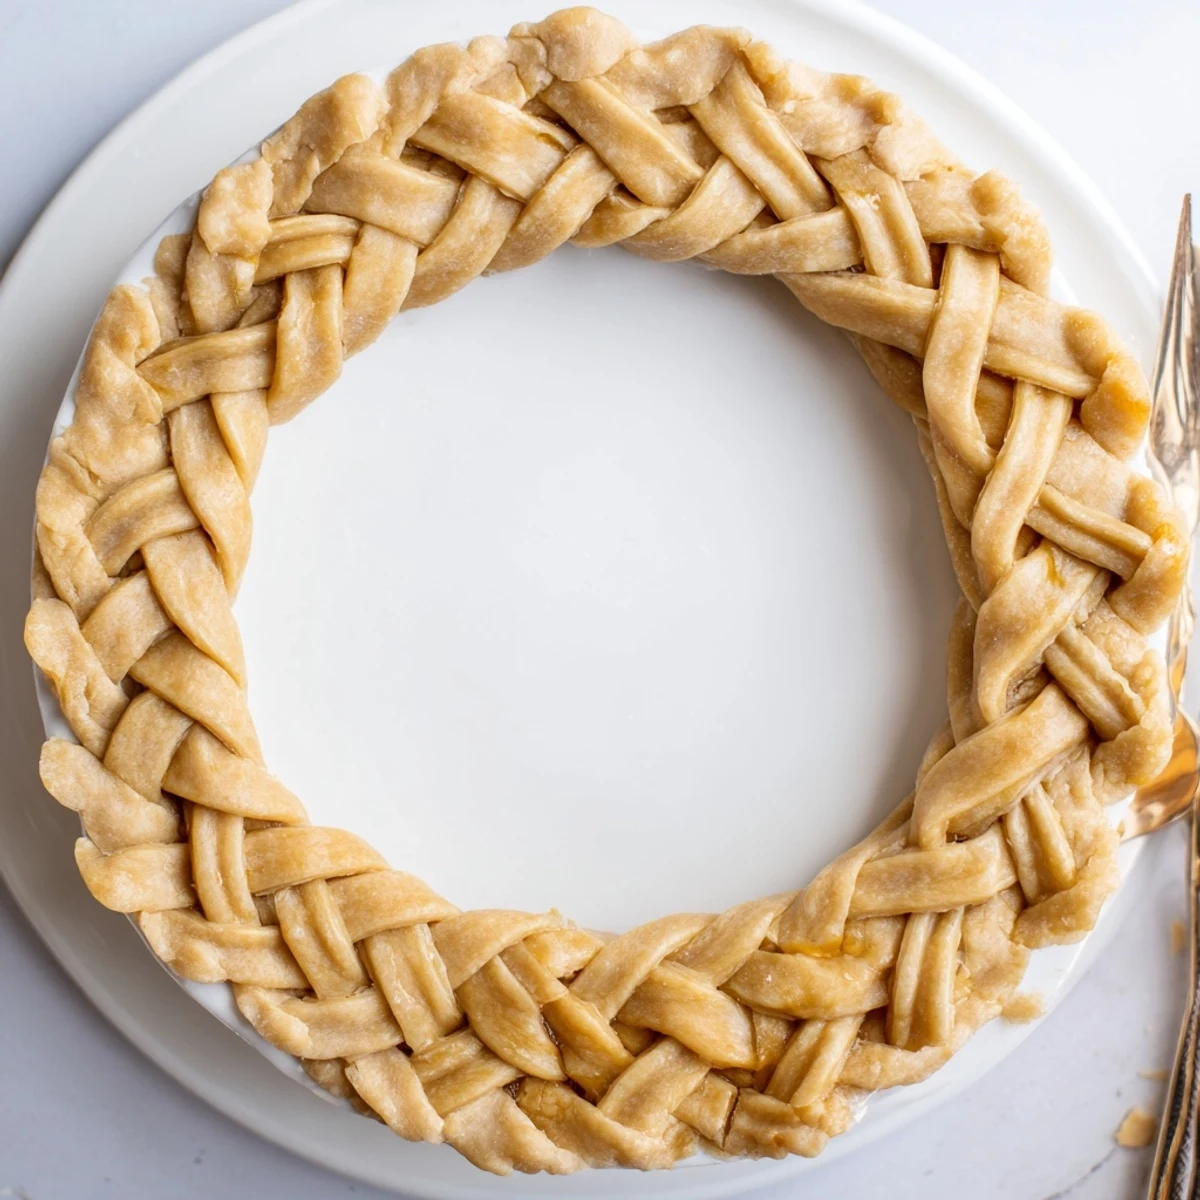
 This decorative crust technique transforms ordinary pies into stunning centerpieces. The fishtail braid creates an intricate woven edge that looks professionally crafted but is entirely achievable at home.
Start with a classic butter-based dough, chill thoroughly, then cut into even strips before weaving. The key is maintaining cold dough throughout the process—this ensures clean edges and prevents the braids from losing their definition during baking.
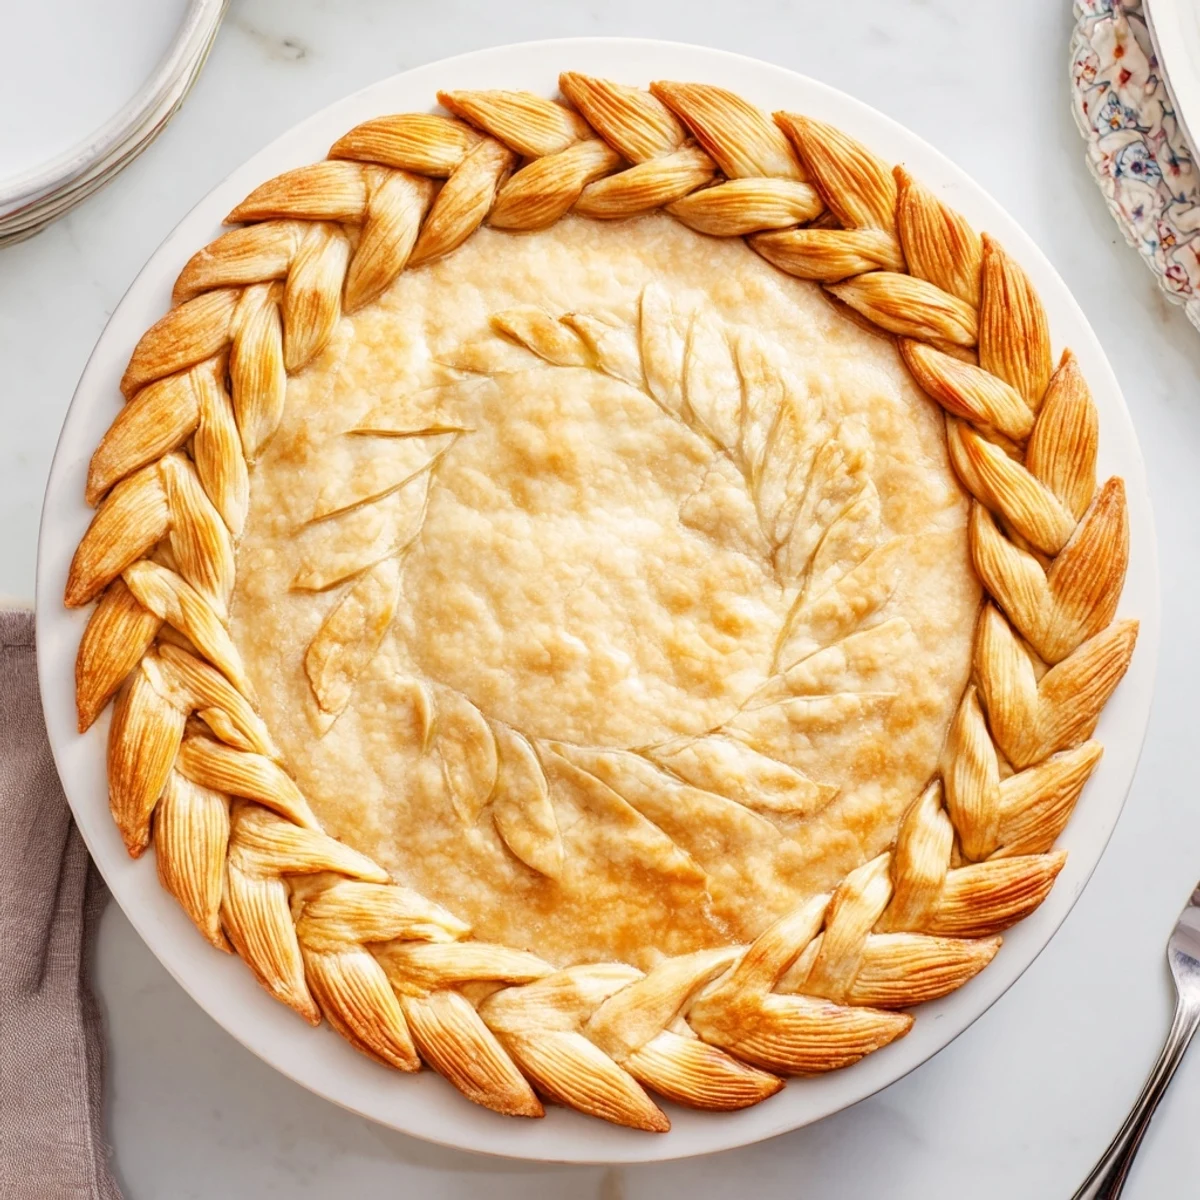
The technique works beautifully for both sweet fruit pies and savory quiches. Apply an egg wash for golden shine, and consider adding herbs or colored dough strips for extra visual appeal.
Perfect for holidays, dinner parties, or whenever you want to elevate your baking presentation. The finished crust adds impressive texture and sophistication to any filling.
The first time I attempted a fishtail braid on a pie crust, my kitchen looked like a flour bomb had gone off. I'd spent weeks admiring these intricate woven crusts on social media, convinced they required some secret pastry chef training I didn't have. Turns out, it's just a simple pattern repeated over and over, though my family definitely ate around my first few attempts. Now it's become my go-to trick for making store-bought filling look like something from a French patisserie window.
Last Thanksgiving, I brought a braided pumpkin pie to my inlaws' house. My sister-in-law actually asked what bakery I'd bought it from, and when I told her I'd woven the crust myself, she made me teach her right there at the dinner table. We ended up with flour on our nice clothes and slightly lopsided practice braids, but honestly, that messy kitchen moment was better than any perfect pie I've ever made.
Ingredients
- All-purpose flour: This creates the structure for your braids, so don't be tempted to skip measuring accurately
- Cold unsalted butter: Keeping everything ice-cold is what gives you those beautiful flaky layers in the finished crust
- Salt: Just a teaspoon makes all the difference between cardboard and something people actually want to eat
- Sugar: Optional, but I always add it for sweet pies since it helps with browning and adds subtle depth
- Ice water: Start with less than you think you need, overhydrated dough makes sad, tough braids
- Egg wash: This is what gives your finished braid that professional golden shine we're all after
Instructions
- Mix your dry ingredients:
- Whisk flour, salt, and sugar together in a large bowl until everything's evenly distributed
- Cut in the butter:
- Work those cold butter cubes into the flour with your fingers or a pastry cutter until you see pea-sized pieces throughout
- Add ice water gradually:
- Start with a quarter cup and toss the mixture gently, adding more only when the dough still looks like dry crumbs that won't hold together when squeezed
- Chill the dough:
- Divide into two disks, wrap tightly, and refrigerate for at least an hour, because warm dough is impossible to braid neatly
- Roll and cut strips:
- On a floured surface, roll one disk into a rectangle and cut at least six even strips about twelve inches long and half an inch wide
- Start your fishtail braid:
- Press three strip ends together, cross the right over center, then left over center to establish your base
- Continue the fishtail pattern:
- Take the outer right strip to center, then outer left to center, always working from the outside edges and keeping tension even
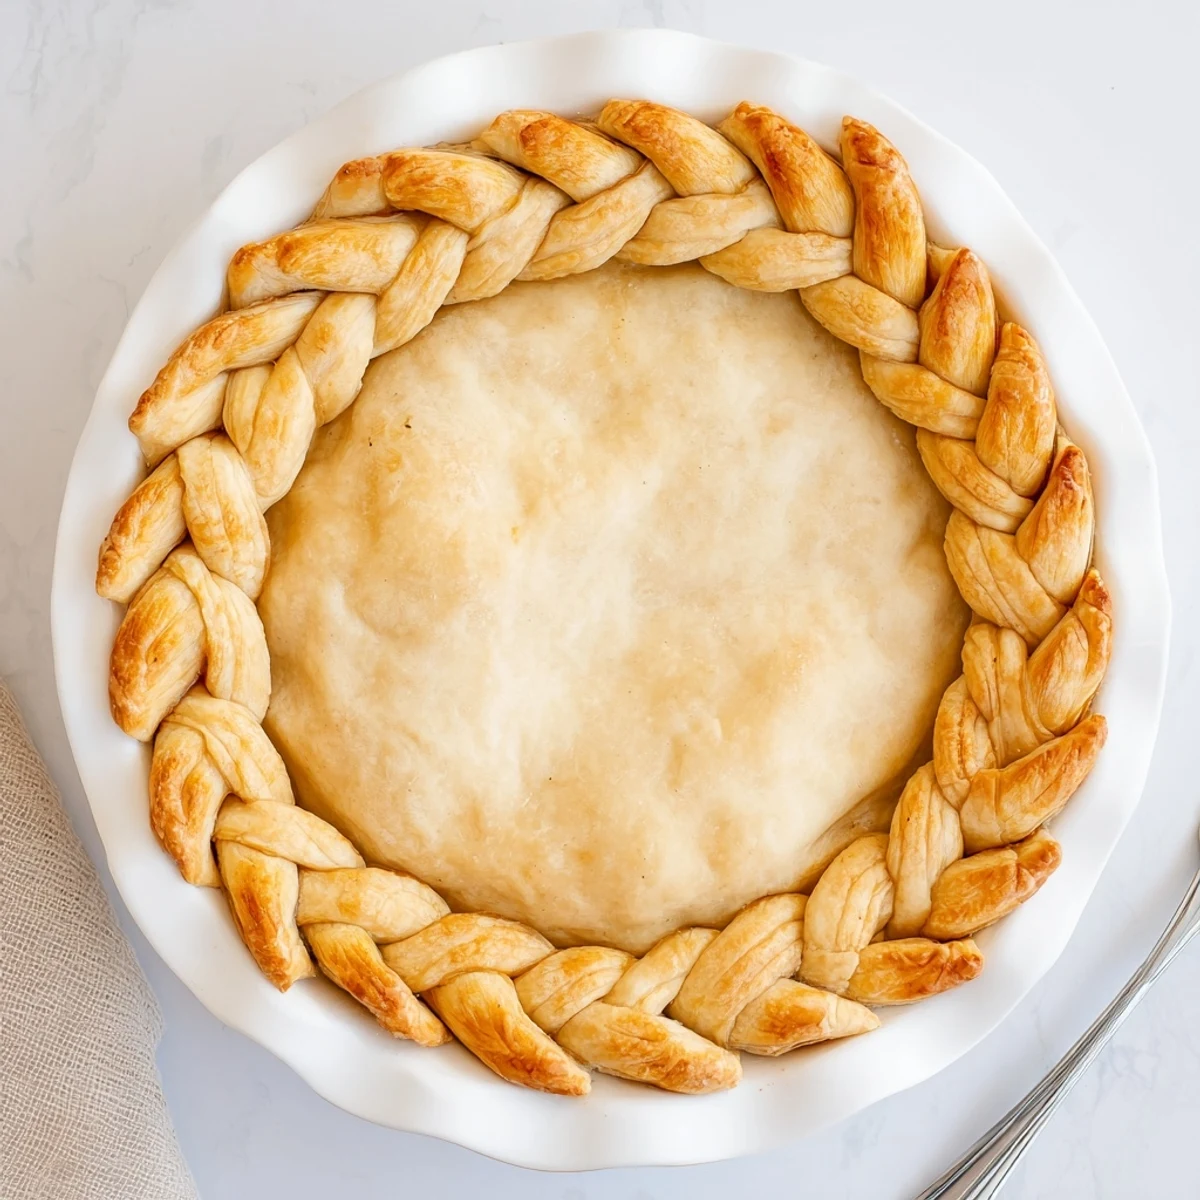
- Attach to your pie:
- Brush the pie edge with water, gently lift your braid around the rim, and press lightly to seal
- Finish and bake:
- Brush with egg wash, chill for fifteen minutes if you have time, then bake according to your filling recipe
 Save to Pinterest
 My daughter now requests this braided crust for her birthday pie every year. She's started helping me with the actual weaving, and her braids are actually neater than mine were at the beginning. There's something lovely about passing down a skill that seemed so intimidating when I first started.
Making Ahead
You can cut and braid your strips up to two days ahead, storing them layered between parchment paper in the refrigerator. Just let them soften for about five minutes at room temperature before draping them over your pie. I've learned the hard way that frozen braids crack when you try to shape them.
Savory Variations
For chicken pot pies or quiches, try mixing dried herbs like thyme or rosemary right into your flour mixture. Sometimes I'll brush the finished braid with garlic butter instead of egg wash for extra flavor. The technique works exactly the same, but the result feels completely different and more dinner-appropriate.
Colorful Creations
One of my favorite party tricks is incorporating naturally colored dough strips for a striped effect. Pureed roasted beets or spinach can replace some of the water in your dough, giving you pink or green strips to weave with plain ones.
- Wrap colored dough separately while chilling to prevent staining
- Use gel food coloring mixed with a few drops of water for vibrant rainbow effects
- Remember that darker colors brown faster, so watch your oven closely
 Save to Pinterest
 The thing about impressive-looking techniques is that they always seem impossible until you actually do them once. Now I can barely remember why I was so intimidated in the first place.
Recipe Questions & Answers
- → How do I keep the braided crust from losing its shape while baking?
-
Keep your dough thoroughly chilled throughout the process. Work quickly when cutting and weaving strips, and refrigerate the assembled braid for at least 15 minutes before baking. This solidifies the butter, helping the crust maintain its intricate woven pattern without spreading or becoming misshapen in the oven.
- → Can I make the braided crust ahead of time?
-
Absolutely. Prepare and braid the strips, then freeze them flat on a parchment-lined baking sheet. Once frozen solid, transfer to an airtight container and store for up to 3 weeks. When ready to use, simply place the frozen braid directly onto your filled pie—no thawing required. Add a few extra minutes to your baking time.
- → What's the best way to attach the braid to the pie edge?
-
Lightly brush the rim of your filled pie with water or beaten egg before placing the braid. This acts as glue, helping the decorative edge adhere securely. Gently press the braid onto the moistened edge, taking care not to deform your careful weaving. The egg wash applied later also helps seal everything together.
- → Can I use this technique with store-bought dough?
-
Yes, though results may vary. Refrigerated pie dough works, but it's often softer than homemade. Roll it out, cut strips, and chill thoroughly before braiding. You may need to work more quickly to prevent the dough from becoming too warm and difficult to handle. For best results, choose a quality all-butter brand.
- → How many braids do I need for one standard pie?
-
Typically, 2-3 fishtail braids will cover a standard 9-inch pie edge, depending on braid thickness. Each braid starts with three strips about 12 inches long. Cut extra strips as insurance—you can always weave additional braids or use leftover dough for cutout decorations on top of the pie.
- → What if my dough strips keep breaking while I braid?
-
This usually indicates the dough is too cold or has been overworked. Let it sit at room temperature for 2-3 minutes to soften slightly. When cutting strips, use a sharp knife or pizza cutter with gentle pressure—sawing motions can create weak points. If dough becomes too warm during braiding, return strips to the refrigerator briefly.
