 Save to Pinterest
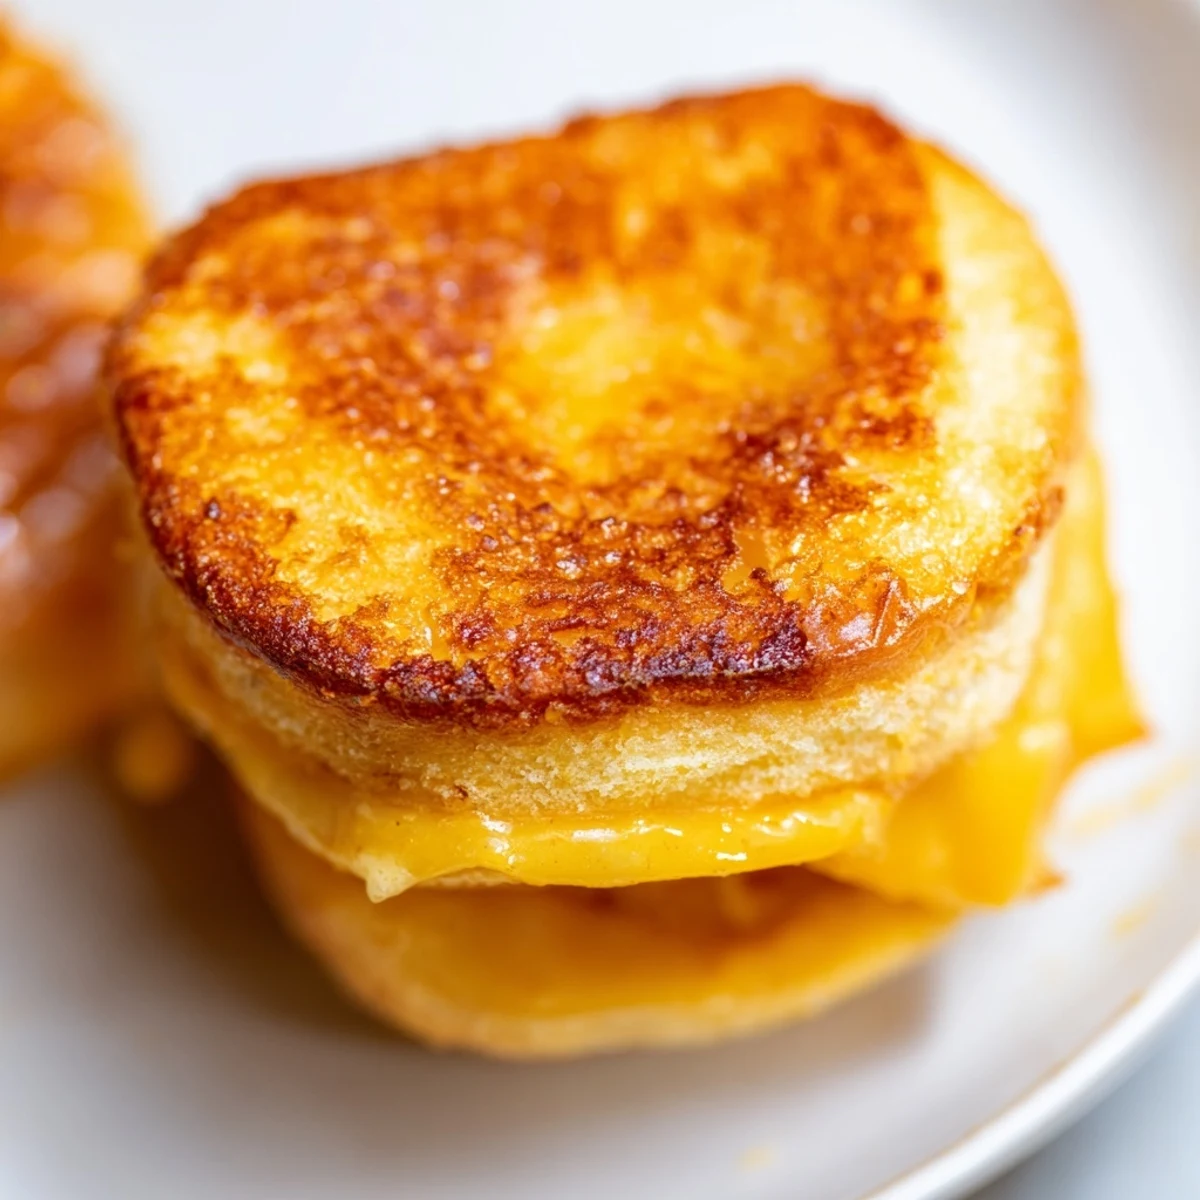
 These sweet and savory sliders transform Hawaiian rolls into irresistible cheesy bites. The secret lies in keeping the rolls connected while slicing horizontally, layering with cheddar, and brushing generously with butter before baking. The result? Golden tops with gooey centers that pull apart perfectly for sharing.
Bake covered first to melt the cheese, then uncover for that gorgeous golden finish. Customize with cooked bacon or fresh tomato slices, or experiment with different melting cheeses like Swiss or pepper jack. For extra flair, whisk garlic powder or dried herbs into your melted butter before brushing.
These mini sandwiches vanish quickly at gatherings. Pair with tomato soup for a comforting lunch, or serve alongside your favorite party dips. They reheat beautifully, making them ideal for meal prep too.
The smell of sweet Hawaiian rolls hitting that buttered heat still takes me back to my first apartment kitchen, where I discovered the magic of keeping the rolls connected. Something about that collective sizzle made everything feel cozy and complete.
I made these for a Super Bowl party years ago and watched them vanish in under five minutes. Now they are my go to for whenever I need to feed hungry friends without the fuss.
Ingredients
- 1 package (12 rolls) Hawaiian sweet rolls: The sweetness balances perfectly with sharp cheddar and creates that irresistible texture
- 12 slices cheddar cheese: Choose a good melting cheese, or mix it up with pepper jack for some heat
- 4 tablespoons unsalted butter, melted: Brushing it on thick creates that golden crunch everyone fights over
- 6 slices cooked bacon, chopped: Totally optional but adds this smoky salty punch people never forget
- 6 slices tomato, thinly sliced: Fresh addition if you want something bright and juicy in there
Instructions
- Preheat and prep:
- Get your oven to 350°F and line a baking sheet with parchment paper for the easiest cleanup later
- Slice smart:
- Cut through the entire package of rolls horizontally while keeping them connected, creating one big top and bottom layer
- Layer it up:
- Place the bottom half on your prepared sheet, arrange cheese slices evenly, and sprinkle with bacon or tomatoes if you are using them
- Bring it together:
- Set the top half of rolls over your fillings and brush melted butter generously across the surface
- Bake covered:
- Tent loosely with foil and bake 10 minutes until the cheese gets all melty and wonderful
- Get golden:
- Remove the foil and give it another 3 to 5 minutes until the tops turn this beautiful golden brown
- Separate and serve:
- Let the whole thing rest 2 minutes, then slice into individual sandwiches while they are still warm
 Save to Pinterest
 My neighbor texted me the next day after I dropped some off asking for the recipe. Now whenever I smell them baking I think about how food connects us in the smallest ways.
Make It Your Way
Sometimes I swap in Swiss cheese and add thinly sliced apples. The tart apple with the sweet rolls creates this sophisticated flavor nobody expects but everyone loves.
Pairing Ideas
These little sandwiches are perfect alongside a steaming bowl of tomato soup. The combo takes me right back to childhood lunch but somehow elevated and better.
Serving Suggestions
I have learned that setting these out right from the oven keeps people gathered around the kitchen island. Everyone reaches in, and somehow that simple act turns eating into an event.
- Mix garlic powder or dried parsley into the butter for extra flavor
- Try mozzarella or pepper jack if you want to switch up the cheese game
- Keep them warm in a 200°F oven if you are not serving immediately
 Save to Pinterest
 Hope these little sliders become a regular in your kitchen rotation too.
Recipe Questions & Answers
- → Can I prepare these ahead of time?
-
Yes! Assemble the sliders up to 24 hours before baking, wrap tightly in foil, and refrigerate. Add 5-10 minutes to the baking time if baking cold.
- → What cheese works best?
-
Sharp cheddar offers the best flavor contrast to the sweet rolls. Other great options include Gruyère, Swiss, mozzarella, or pepper jack for a spicy kick. Mix multiple cheeses for extra depth.
- → How do I prevent soggy bottoms?
-
Use parchment paper on your baking sheet for even heat circulation. Avoid over-brushing butter on the bottom layer—focus the butter on top for that golden crunch.
- → Can I freeze these?
-
Absolutely! Freeze assembled, unbaked sliders wrapped in foil and plastic for up to 3 months. Thaw overnight in the refrigerator, then bake as directed.
- → What's the best way to reheat leftovers?
-
Place in a 350°F oven for 5-8 minutes until heated through and cheese is melty again. Avoid microwaving, which makes the rolls tough.
- → Can I make these spicy?
-
Add sliced jalapeños or red pepper flakes with the cheese. Use pepper jack cheese, or brush with garlic butter and sprinkle everything bagel seasoning before baking.
