 Save to Pinterest
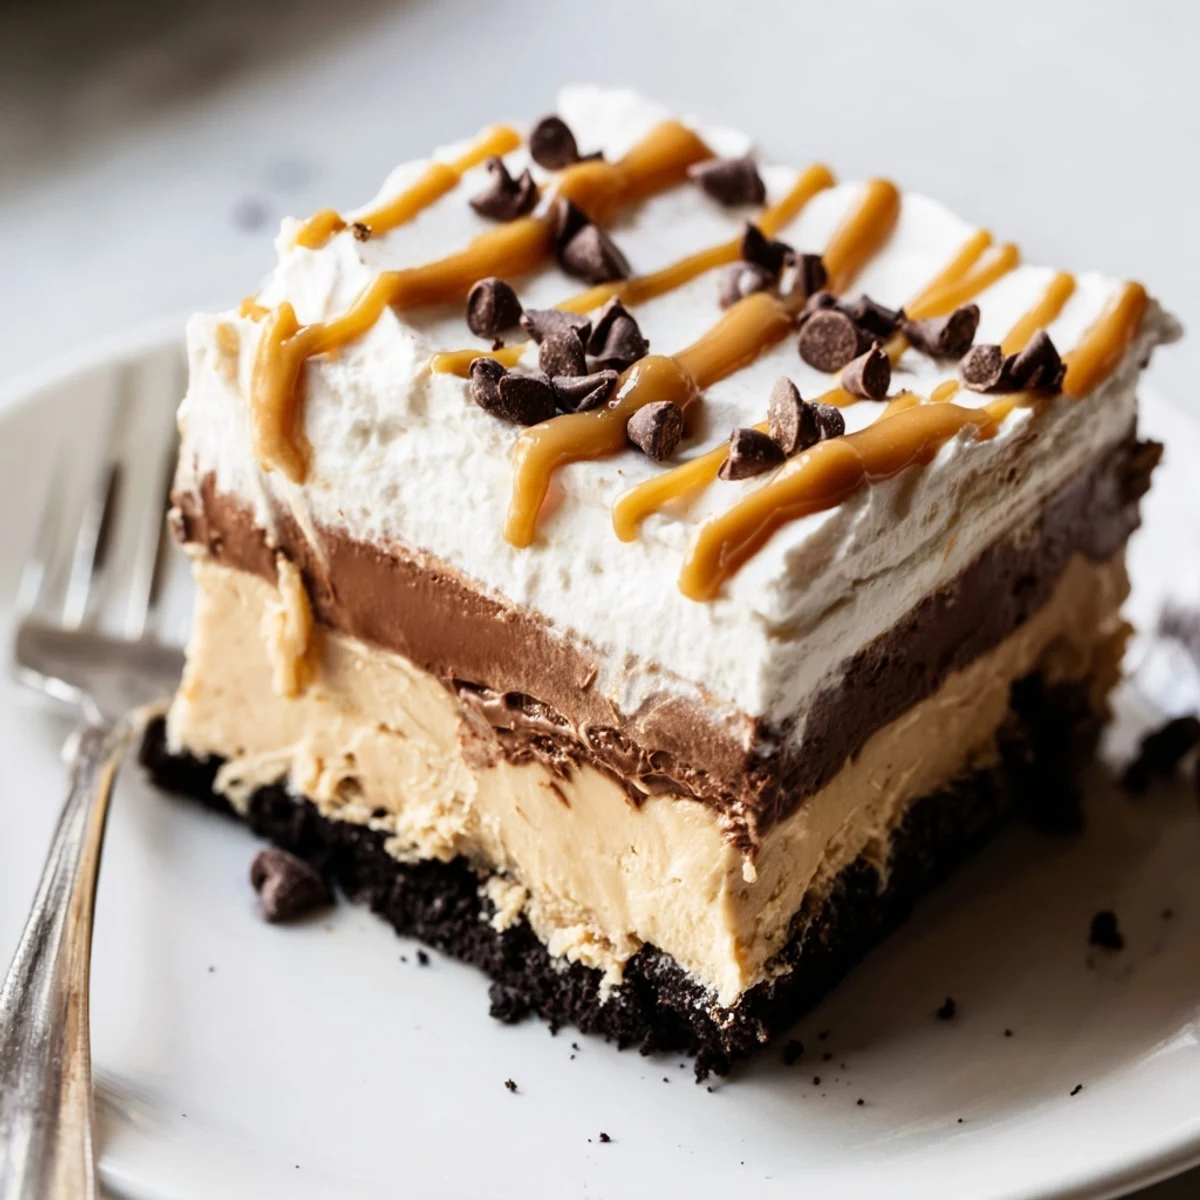
 This no-bake layered delight brings together a crunchy chocolate cookie crust, a velvety peanut butter cream cheese filling, rich chocolate pudding, and a fluffy whipped topping. It's an easy-to-make crowd-pleaser that requires just 25 minutes of prep before chilling.
Simply press the crust, whip up each creamy layer, spread them one on top of the other, and let the refrigerator do the rest. The result is a decadent, sliceable dessert perfect for gatherings, potlucks, or satisfying any peanut butter craving.
The air conditioning was broken the July weekend my sister announced she was bringing her new boyfriend to dinner, and the thought of turning on the oven felt like a personal attack.
That broken air conditioner turned out to be a gift, because it forced me to get creative with a no bake dessert that has since become the most requested dish in my entire rotation, even beating out my grandmothers pecan pie at Thanksgiving.
Ingredients
- Chocolate sandwich cookies (200 g): Crush them finely for the best crust texture, and leave a few chunky bits if you like a little surprise crunch.
- Unsalted butter (75 g), melted: This binds the crumbs together, and using unsalted lets you control the sweetness.
- Cream cheese (225 g), softened: Set it out an hour ahead so it blends without lumps, because nobody wants a bumpy peanut butter layer.
- Creamy peanut butter (120 g): Use the standard commercial kind here, not natural, since the stabilizers help the layer hold its shape beautifully.
- Powdered sugar (100 g): Sift it first to keep the filling silky smooth.
- Whipped topping (480 ml total, divided): Keep it thawed in the fridge overnight so it folds in gently without deflating.
- Instant chocolate pudding mix (100 g): The instant variety sets fast and gives you that dark, fudgy layer without any cooking.
- Cold milk (375 ml): Whole milk makes the pudding richer, but any milk works fine.
- Melted peanut butter and chocolate shavings (optional): These finishing touches make the top look like it came from a bakery.
Instructions
- Build the crust:
- Toss the crushed cookies with melted butter until every crumb glistens, then press the mixture firmly and evenly into your baking dish using the back of a spoon or the flat bottom of a measuring cup.
- Whip up the peanut butter filling:
- Beat the cream cheese, peanut butter, and powdered sugar together until the mixture looks like cloud frosting, then gently fold in the whipped topping with a spatula so you keep all that airiness intact.
- Spread and layer:
- Pile the peanut butter mixture over your chilled crust and spread it out with slow, even strokes to avoid disturbing the base beneath.
- Make the chocolate pudding:
- Whisk the pudding mix and cold milk together for about two minutes until you feel it thicken under your whisk, then pour it gently over the peanut butter layer.
- Finish the top:
- Spread the remaining whipped topping over the pudding, then drizzle with melted peanut butter and scatter chocolate shavings if you are feeling fancy.
- Chill patiently:
- Cover the dish and tuck it into the fridge for at least three hours so every layer sets into clean, beautiful squares when you slice.
 Save to Pinterest
 That boyfriend from the broken air conditioner weekend is now my brother in law, and he still mentions this dessert every single time I see him.
Serving Suggestions
A cold glass of milk is the obvious pairing, but a scoop of vanilla bean ice cream on the side turns each square into something truly special for a birthday or celebration.
Storage and Make Ahead Advice
This dessert actually tastes better on day two because the layers have time to meld together, so you can make it the night before your event and cross one thing off your list.
Variations Worth Trying
Once you master the original, small tweaks open up a whole world of possibilities.
- Swap chocolate cookies for graham crackers if you want a lighter crust.
- Tuck chopped roasted peanuts between the filling and pudding for a satisfying crunch.
- Use homemade whipped cream instead of whipped topping for a richer, more decadent finish.
 Save to Pinterest
 Some desserts are just food, but this one has a way of becoming the story people remember long after the plates are cleared.
Recipe Questions & Answers
- → Can I make this ahead of time?
-
Yes, this dessert actually benefits from being made ahead. You can prepare it up to 2 days in advance and keep it covered in the refrigerator. The layers set beautifully and the flavors meld together over time.
- → Can I use natural peanut butter instead of creamy commercial peanut butter?
-
Commercial creamy peanut butter works best for this dessert because it blends smoothly with the cream cheese and sugar. Natural peanut butter can separate and may not yield the same silky texture in the filling layer.
- → How do I get clean slices when cutting?
-
Use a sharp knife and wipe it clean with a damp paper towel between each cut. Running the knife under hot water, then drying it before slicing, also helps achieve neat, clean squares.
- → What can I substitute for whipped topping?
-
You can use an equal amount of homemade whipped cream. Whip 240 ml of heavy cream with a tablespoon of powdered sugar until stiff peaks form. Keep in mind that homemade whipped cream may soften faster than commercial whipped topping.
- → How long does this need to chill before serving?
-
The dessert needs at least 3 hours in the refrigerator for the layers to set properly. For best results, chill it overnight. This ensures the pudding firms up and the layers hold together when sliced.
- → Can I freeze leftovers?
-
Yes, you can freeze individual slices wrapped tightly in plastic wrap for up to 1 month. Thaw them in the refrigerator for a few hours before enjoying. The texture of the whipped topping may change slightly after freezing.
